

How To Get Domain_6 Account Verified
Domain Verification will allow you to send from any email address on a particular domain. For example, once you have verified mydomain.com, you can send emails using the Postmark platform with any @mydomain.com email address. This feature is especially useful if you send from a large amount of email addresses in a single domain or send email on behalf of your customers.
Adding the DKIM record to the domain's DNS will not affect any other DNS records already in place, nor affect sending from the domain using a method other than Postmark.
Once you have verified DKIM for the domain, you are all set to begin sending from any email address on the domain. Optionally, you can also add a custom Return-Path to help ensure effective delivery. Adding a Return-Path is not required for verifying the domain, however.
Click on the image to view our video collection on how to set up DKIM, custom Return-Path, and DMARC records in various DNS providers, or follow the detailed instructions listed below.

Adding and Verifying a New Domain
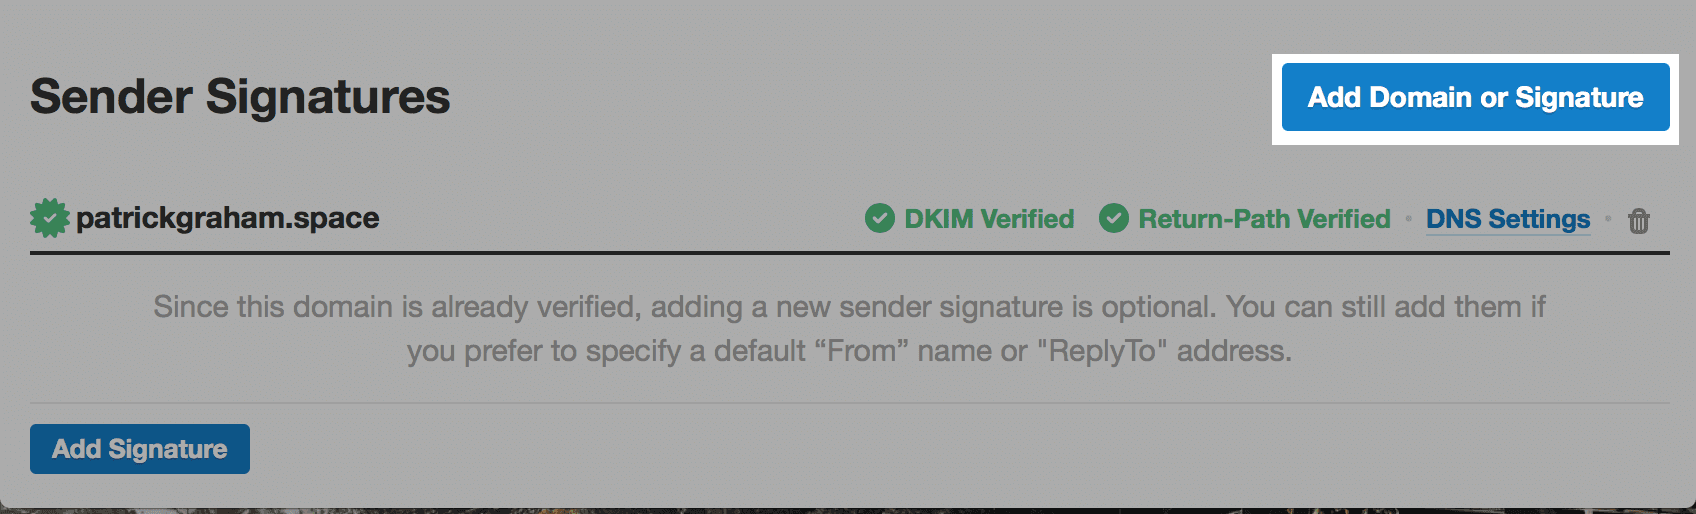
- Log into Postmark and navigate to Sender Signatures.
- Select Add Domain or Signature.
- Select Add Domain.

- Type in the domain you are adding, and select Verify Domain.

- Postmark will generate DKIM record that needs to be added to your DNS in order to verify the domain.

- Once the DKIM Hostname and Value is added to your DNS, choose Verify.
Please note: It can take up to 48 hours for the DNS changes to propagate. After DKIM is verified, you can immediately begin sending from any email address on the domain.
After DKIM is verified, Postmark will display a green checkmark next to the domain in your Sender Signatures.

Add Domain Verification for an Existing Sender Signature#
If you have already verified DKIM for a Sender Signature and the DKIM record is unique for your account (the domain and DKIM record is not shared across multiple Postmark accounts), the domain will be verified automatically.
- Navigate to Sender Signatures. Under the domain you are adding Domain Verification for, select Add a DKIM DNS record.

- Postmark will generate DKIM record that needs to be added to your DNS in order to verify the domain.
- Once the DKIM Hostname and Value is added to your DNS, choose Verify.
Please note: It can take up to 48 hours for the DNS changes to propagate. After DKIM is verified, you can immediately begin sending from any email address on the domain.
After DKIM is verified, Postmark will display a green checkmark next to the domain in your Sender Signatures.
How To Get Domain_6 Account Verified
Source: https://postmarkapp.com/support/article/1046-how-do-i-verify-a-domain
Posted by: millerdurstownsee.blogspot.com
0 Response to "How To Get Domain_6 Account Verified"
Post a Comment